


Video Transcript
Gary The Water Guy:
Hi. I'm Gary the Water Guy, and I own The Water Filter eStore and The Water Store in Midland, Ontario.
Gary The Water Guy:
After you've had your water softener for a few years, you may notice inside the brine tank that there's a black ring and there's some other black stuff along the sides. Yep. That's mold. We can see the mold stains around the outside and the black ring, and that's what we want to get rid of. It's a good idea to remove that, to clean that out, so you get a nice, fresh start.
Gary The Water Guy:
Now, there's a couple of different kinds of water softeners. There's a post-fill water softer like this Clack valve here, which means there's water in with the salt to make the brine, or there's a pre-fill water softener. If you see, there's no water in with the salt. That means it's a pre-fill. Those ones are a little bit easier to clean out. Basically, you just remove the salt, you clean inside the brine tank. You can use dish-washing soap. Or if the mold stains are quite significant, you can use something like this, The Ultimate Mold Eliminator. Then you refill it with salt and you're good to go. With a post-fill one like this, you have to remove the water first. You can either use a shop vac, or if you want to do it a little bit easier and eliminate the step of the shop vac, you can actually put it into a regen cycle. With the brine cycle, it'll draw the water out of the unit itself, and that'll make it a little bit easier.
Gary The Water Guy:
We can put this water softener into regen mode just by holding down the regen button for five seconds. The first stage that it goes into is the backwash cycle. Once it starts counting down, once the cycle's actually begun the timing, then we can advance to the next cycle. We press the button again, we go into the brine cycle, and again, once it starts counting down, it's going to suck all the water out of the brine tank and it makes it a lot easier to clean. Like I say, either you can do it this way, or it can use the shop vac. Then when you're done, when it's gone through the cycle, you can advance it through the rest of the cycles. Again, once it starts counting down, that's when you can advance it to the next one. Then take it back to home. But for this particular process, we want to make sure we leave it on that brine cycle for the full 60 minutes. That way, it'll draw all the water out and make it a lot easier to clean out the brine tank.
Gary The Water Guy:
Once you've done that, again, you need to clean it out, put new salt. With the post-fill ones, you're going to have to add three gallons of water, set it to regenerate that night, and it'll go through the whole process, clean itself, and you'll be back a hundred percent in service again the next day.
Gary The Water Guy:
Our newly cleaned brine tank topped up with salt and water. If you like what you saw today, please click the subscribe button. That way, you'll be notified about any new videos that become available on this channel. If you want to get some more information, you can go to our website, either thewaterstoremidland.com or thewaterfilterestore.com.
Again, I'm Gary the Water Guy from The Water Store in Midland, Ontario. Thanks for watching.
If you’ve owned your water softener for a few years or more you may notice some dark stains near the water line in the brine (salt) tank. You guessed it, that's mold. It’s a good idea to clean that out so your water softener has a nice, fresh start.
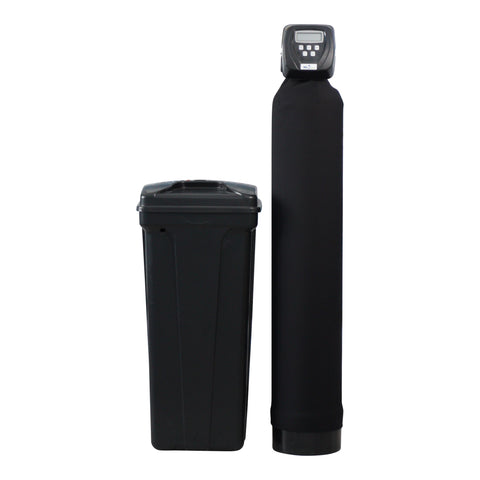
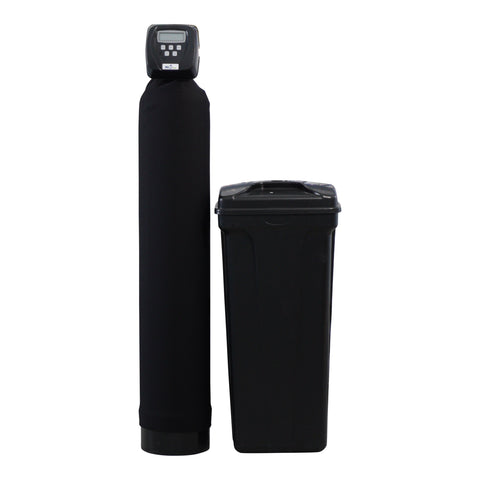
Cleaning out your brine tank is a fairly easy process, especially if you have a two-piece water softener with a Clack valve like this one! It should be done any time you start to see dark mold spots building up on the inside of your brine tank.
Start by planning ahead. You will want to schedule this task for when you have a minimal amount of salt in the tank. If you’re about to add salt to your brine tank and you notice these black lines, consider setting that salt aside and tackling a nice cleanup first! And you definitely don't want to try this when you have a salt clog!! If you find yourself stuck with a salt clog, take care of that first before trying to tackle the cleaning job.
Cleaning Pre-Fill vs Post-Fill Brine Tanks

Most water softeners fill the brine tank with water as the last cycle of the Regeneration process, if that is the case with yours, you will see water in the bottom of the brine tank, intermixed with the softener salt. That is known as a Post-Fill water softener. If you don't see any water in the bottom of your brine tank, yours is a "Pre-Fill" water softener, which is the easiest to clean.
For a Pre-Fill water softener, all you need to do is remove the salt, clean the inside of the brine tank, and then return the salt.
For a “Post Fill” softener, which fills the brink tank after each regeneration cycle, you’re going to need a few additional steps to remove the water AND the salt from the brine tank before you can clean it properly.
Steps to Clean Your Brine Tank

Step 1 – Remove the Water from the Brine Tank
The first step is to remove the water from the brine tank. You can do this by using a wet/dry Shop Vac, or you can let the water softener do that for you.
To remove the brine in a "Post Fill" water softener with a Clack valve, start by forcing your water softener into a regeneration. On modern water softeners, this is easily done by holding down the regen button until the motor starts up.
You want to get your water softener into the brine cycle so it starts to suck out the water in the brine tank, which is the second cycle so press the Regen button again and the word Brine will appear on the display. You may need to wait until the first cycle starts to count down before being able to press the Regen button again to skip this cycle.
Note the countdown time on the display, as that is usually an indication of how much time you have so that you can go and do something else while the brine is being removed from the brine tank.
Once the water is out of the brine tank, place the water softener into bypass so the system doesn’t refill the brine tank before you’re finished.
Step 2 – Remove the Salt from the Brine Tank
Once all the water is gone from the brine tank, you’ll also want to get the remaining salt (if any) out of the way so you can give your brine tank a thorough cleaning.
You should be able to scoop the salt out of the brine tank and place it in a plastic bucket. Just make sure to wear rubber gloves while doing this, as the pure salt tablets can be quite harsh on the skin.
Step 3 – Cleaning the Brine Tank
If you have a 2-piece water softener, you can either clean the brine tank in place or disconnect it and take it outside where it might be easier to clean. With a one-piece water softener, you have no choice but to clean it in place. You can use dishwashing soap to wash clean it out, or – if the mold is quite significant – you may need a mold eliminator. Once the brine tank is spic and span, make sure to rinse it thoroughly to remove any soap residue.
Remove the cleaning water by either dumping it out or with a shop vac. Do NOT use the regen cycle to attempt to suck the water out of the brine tank again, as you don’t want that water entering your softener system.
Step 4 – Filling and Restarting Your System
If you have disconnected your brine tank, start by reconnecting it to the system. Then you’ll want to add a couple of new bags of salt. We don’t usually recommend putting the old salt back into the softener, because you want everything to have a nice, clean, fresh start.
Add 3 gallons of water to the salt and then manually scroll through the Regen cycles to get it back into service, if not already there. Take water softener out of bypass and put it back into service.
Set your system to “Regen Today” so the water softener will Regen at its pre-set Regen time and it will go through the whole process, clean itself, and make sure you are back at 100% softening capacity by the next day.
Your Brine Tank is Clean, Fresh and Ready to Soften Your Water

Nobody likes dirty water, especially inside their home. Make sure to inspect the inside of your brine tank each time you add salt to check for tell-tale signs of mold. If you see them, clean them out to make sure your system is running at its best.