


Has your water softener stopped softening water for your family?
Have you noticed the water flow in your whole house has slowed down because the media bed is so clogged in your water softener from sediment or chlorine?
Have you noticed a terrible smell coming from your unit?
This video is for any DIYer or plumber who’s looking to replace their
water softener resin or media at home or on the job. The same procedure applies if you’re replacing the media or resin in any form of
back washable filter -- whether it’s an iron filter, tannin filter, back washable carbon, or even a multimedia filter.
To walk you through the process, today we’re going to replace the media in my
water softener at home. I should mention that there is nothing wrong with my water softener, I’m just doing this today to show you how.

Before you begin you need to know a couple of things:
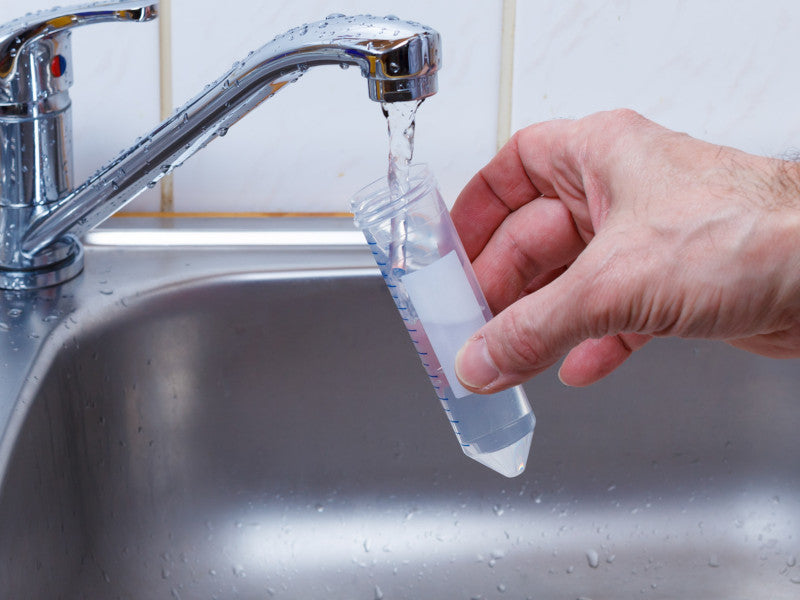
- MEDIA TYPE: Whatever water filtration equipment you’re replacing the media in, you need to know what kind of media goes inside and how much. This is not the time to be replacing the media with a different media hoping for a different result. There may also be gravel at the bottom of that media tank, and if that’s the case, you will need to replace that too. Check it out or look at the manufacturer's website to find out before you start!
- FREEBOARD SPACE: Every back washable type filter has freeboard which is why you need to know how much should be in there so as not to overfill it.
- PLAN FOR A MESS: There will be spilled water and media, so prepare for a bit of a mess! If you don’t have a suitable area to work inside, you’ll be removing the tank and doing the work outside, so also ensure you have someone available to help carry the tank.
-
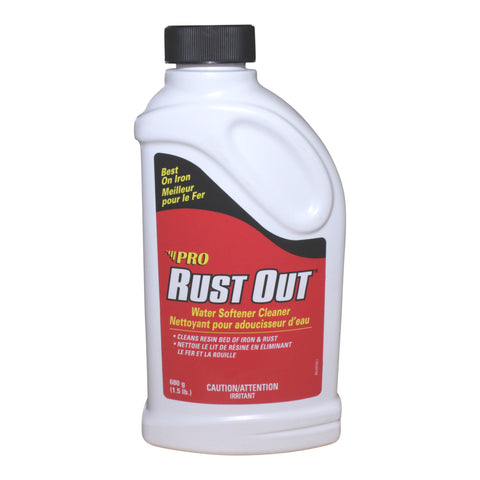
TOOLS YOU'LL NEED: You’ll need a funnel and some painters tape. I also suggest you have some
Iron Out or similar on hand to clean out any iron deposits inside the tank. Some towels/rags and a container to catch water is highly recommended as well.
- REPLACEMENT PARTS: If you’re replacing the media in an iron filter -- or if your water softener is being used as an iron filter -- you’ll likely need to replace the top basket and riser tube, so make sure you have the replacement parts ready before you begin.

Once you have all that lined up, we are ready to start replacing the resin or media inside your unit. Now, let's fix your water!
- Start a manual regeneration to release the pressure inside the valve and put it into bypass. Shut off your water supply.
- Disconnect the bypass, brine line, and drain line from the water softener, being careful to catch the spilled water if your drain line goes up. Advance the valve back into the service position.
- Drain the tank either by tipping it over, siphoning, or by blowing out the water with a compressor.
- If you have nowhere to work inside, take everything outside, and find a spot where you can flush the media out without damaging too much.
- Unscrew the valve from the top and remove it. Pull out the riser tube and either clean or replace it.
- You can try to pour the media out into a bag or onto a screen and put the media into buckets to get rid of it. Flush the remainder of the media out with a garden hose.
- Put the riser tube into the tank and tape off the end so you don’t get any media inside it.
- Once you know what goes back inside the tank, you can add the gravel, if it’s used, and then the media itself.
- Make sure the threads are clean, if necessary, you can wash them off. Remove the painter's tape.
- Put the valve back on, being sure to put plumber's silicone grease on the o-ring from the valve and on the end of the distributor.
- Carry the tank back into the installation area. Connect to bypass, brine line and drain line. Plug in the water softener.
- Put the water softener into back wash and open up the inlet of the bypass about ½ way and fill up the tank. You will hear the air and then the water running to the drain. After about 4 or 5 minutes you can open the valve all the way and check for leaks.
- Run the water softener through a full regeneration.
There you have it. A step-by-step DIY guide on replacing your Water Softener resin or media from our resident pro, Gary The Water Guy.
If you like this video, be sure to check out our video library on YouTube, with hundreds of DIY videos to help you install our products yourself!
Click here for your next video on water softeners for your home, cottage, or cabin... and I’ll see you there!
Video Transcript
Gary The Water Guy:
Has your water softener stopped softening the water for your family? Have you noticed that the water flow in your whole house has slowed right down because the media bed is so clogged in your water softener either from sediment or from chlorine? Have you also noticed that maybe you're getting a really bad smell? It smells like garbage coming from your water softener. Well, it's time to replace the media and I'm going to show you how right now.
Gary The Water Guy:
Hi, I'm Gary The Water Guy, and I simplify water filtration to help you conquer crappy water for your family. This video is for do it yourselfers or plumbers that want to replace the media themselves in either the water softener, iron filter, tannin filter, back washable sediment filter, or back washable carbon filter. The process is exactly the same. Now, one thing you need... A few things you need to make sure of.
Gary The Water Guy:
And that is, first of all, you need to know what kind of media you have inside your system. So my 27,000 grain water softener here, that's the one that we're going to be replacing the media in today. I need to know, first of all, what kind of media it is. And I know that it's a water softener media, but I also need to know how much media is inside there. And again, it's 27,000 grains. So media, for example, so a media comes into one cubic foot bag. That's 30,000 grains. So I'm going to need to take 10% of that media out of that bag, before I put it inside here to make sure I'm getting the right amount of media. So some water softeners and definitely iron filters, et cetera, have a gravel bed at the bottom. So you need to know that. So you need to contact the manufacturer to find out exactly what media and how much of it you need to replace in your water softener or back washable filter, et cetera.
Gary The Water Guy:
So again, if you have a 45,000 grain water softener, for example, you're going to need two bags of media, but you're only going to use one and a half bags of media. So the other thing you got to keep in mind, you need to have a proper work area. So we're doing this in my basement. It's an unfinished basement. It's a concrete floor here. So I can work in this area, no problem. But if you're working in a finished area, this is going to be messy. There's going to be water spilled, and there's going to be media spilled. So you may be better to just drain the system, take it outside and do the work outside, if that's an option. Another thing you need to keep in mind is that there's free board. So that's a space above the media, inside the tank so that when the backwashes, it can expand the media to flush all the debris to the drain. So you don't just remove the media and then fill up the tank. That's going to eliminate that free board. And then it's just not going to work properly.
Gary The Water Guy:
In terms of some extra supplies. If you're doing an iron filter, then you're probably going to need a new riser tube because you're probably the one that's inside, there's probably going to be too dirty for you to reuse. You also want to use, have some iron out or a powder that removes iron, that you mix with water. And then you can put any components in there to clean them up. You're also going to need some painters tape for when you're putting the unit back together and you're going to need a funnel for putting the media into it.
Gary The Water Guy:
Okay. So I should add at this point out that there's absolutely nothing wrong with this water softener. I'm just going through this process here today, just to show you how it works. So the first thing we're going to do is we're going to regenerate. So you hold down the regeneration button on this Clack WS1 belt, and that's going to start back washing. Once it's gone into it's backwash, you can bypass it and that will isolate the water softener from the plumbing because we're going to disconnect it between the bypass and the unit itself.
Gary The Water Guy:
Then I'm going to grab a small bucket. And so, because our drain line goes up, the water is going to be a fair amount of water back washing from the drain line. So if your drain line goes down, you don't have to worry about that. But in our instance here, so I'm going to press down and pull out this e-clip. This e-clip's what's securing the drain line in place, then I got to pull it up and drain it down into this bucket. As you can see, there's a fair amount of water that's coming out of there. Once that's drained out, then you can just secure this somewhere up here temporarily.
Gary The Water Guy:
And so make sure you don't lose the mixture. You don't lose the e-clip. So we'll set that aside and then we'll pull up the e-clip from the brine line. And again, we just pull that straight out like so, and again, we can just set that aside and again, make sure you don't lose track of the e-clip because we're definitely going to use that later. And then you're going to want to put the valve back into service and depending on how you're going to flush the water out of the tank, it's going to be much easier to remove the water if the valve is in surface. So I'm just advancing through the cycles so you can advance to the next cycle once it starts counting down. And we're going into the fill cycle and we'll know that when we're back in services, because it's going to display the current time.
Gary The Water Guy:
All right now. So we're back in service. So now what we're going to do is we're going to disconnect between the bypass valve and the water softener itself. So again, we're fortunate here because we've got a Clack WS1 valve. These are very easy to work on and very easy to disassemble.
Gary The Water Guy:
You don't need tools for a lot of this. So when we separate this, there's going to be some water spilled. So I've just got a little container here that I'm going to use to catch the water. So just unscrew that and unscrew that. It wouldn't hurt at this stage to shut off the water in the whole house. That's what I'm going to do here now, because it has got a bypass, there's not going to be a lot of water coming out, but it never hurts to be on the safe side, especially when we're dealing with water in someone's homes. So as you can see, we've pulled this forward and there's a bit of water comes out and let me just kind of walk the tank a little bit forward. So if I turn this around so you can see a little bit better.
Gary The Water Guy:
So this is the inlet you can tell here, because there's an arrow going in and this is the outlet. There's an arrow going out. So there's a number of ways that we can get the water out of the tank. You can lay the whole thing down and just let the water flow out. You can spin off the head, which we're going to do in a minute and then siphon the water out. Like I said, there's a number of different ways to do it. I have some fittings that I use to pump the water out with the compressor and I'll show you how that works right now. So this is what I use to push the water out of the media tank. It's just some fittings that I cobbled together. So this is the tail assembly. This is what we use to connect to the water softener to the plumbing.
Gary The Water Guy:
I just put it in a short piece of copper there and then I've just cut some fittings so that I can connect my compressor to it. That's for the inlet. And then for the outlet, something very similar, same kind of fittings. And then I've just got a fitting on the end here that's going to attach to a garden hose so I can hook that up and run it into a bucket when the compressor pushes the water out.
Gary The Water Guy:
So I'm just going to replace some rags on top here, just in case of some water blows out from the compressor. So as you can see, I've connected up the inlet and I fastened this and the outlet with the tail kit that we would normally use to attach the plumbing to the water softener. And then this goes down to a hose that's in a bucket. And so I'll just grab it. The compressor here in gray. So going to do, is I'm going to put this up here, I'm just going to pressurize it to get some water flowing through. So this was why you needed to make sure you put it back into service because you see if you left it on backwash, the water would come flying out of where the backwash line connects.
Gary The Water Guy:
As you get to the end, there's mostly just air coming out of there.
Gary The Water Guy:
All right. So I've disconnected all that stuff. Moved this out a little bit closer so you can see it. And so now you need to kind of hold the tank. I usually hold it, brace it with my feet and then push the valve to knock it loose. Now, again, be careful when you're doing this, especially if it's an iron filter or you have a lot of iron because iron can be sitting in here and when it twists, you end up getting it all over yourself. I've had that happen. So then what you do is you just unscrew the head. Now what you can do is kind of whip it back and forth a little bit, again, trying not to get yourself too messy. I did say this was a messy job, right? Remember that? Yeah. So once you've got it loose, then what you can do is kind of wiggle it back and forth to break it free from that riser tube and then pull it out. So as you can see, this is a quite discolored here.
Gary The Water Guy:
Got a little cloth here, quite discolored here. And remember, this is after an iron filter. So you still get a little bit of iron residue coming through, but the water softener also removes iron. So that cleans it up for the household. So you can clean that up. If this is clogged and again for an iron filter probably will be, then you need to grab this, unlock it and pull it out. If it doesn't come out and often they don't, then what you can do is you can just cut it right along here. And then with a screwdriver, pry out the part that's holding it in. And then you just put a new one on. So anyway, and then what you do is just set the valve aside. And then what you need to do is pull out the riser tube. So sometimes you need a little bit of help doing this, pair of pliers. I'm going to remove the sweat jacket. So I can say this one does have a sweat jacket on it.
Gary The Water Guy:
And that's for when you have it in a warm humid area that it doesn't sweat all over the place, obviously, and have mold on it. You can see this tank. I don't know if you can see it, I guess right at the bottom of your picture there, you can see this tank pretty much looks like new. It's not all covered with mold and it's because it's had that sweat jacket on for many years. So let's see if we can pull it that riser tube. Not so much. If you can't get it out, then when you dump the media out, the riser tube will come with it at the same time. All right. So what I've got here now, I've got a bucket, actually, an old galvanized, an old galvanized steel bucket. And I put two heavy duty garbage bags inside. So this is to hold the media. You need to make sure they are heavy duty because the media is very dense. And so then what you do is just pick up the whole tank, turn it upside down and shaking it around to get that media out and the riser tube.
Gary The Water Guy:
All right. Riser tubes coming out here now. Whoops. And let's just pull out that riser tube. And one thing you get to notice about our softener media is that it's like, they're like ball-bearings. And so they are, if you spill them on the floor, especially when it's dry, then someone steps on it, they could slip and fall quite easily. If you can't get it all out and then what you'll have to do is you have to take the whole tank outside and flush it out with a hose.
Gary The Water Guy:
Okay, so I hardly got any media out just by dumping it over. So then what you need to do is you need to fluidized the media and you do that with water and it's once this fills up with water, it's going to flush the media out. I've got the towels down here, because I'm hoping to hold as much of the media on the towels as I can, but you can see it's coming out now. You just keep feeding that hose in there. And then now what I'm going to do is I'm going to scoop up the media off these towels once I'm done. And I put it into those garbage bags that I started with earlier on. You can see it's just pouring out. Now, if you're doing this with a back washable carbon filter, like a carbon filter that's used to remove chlorine from municipal water system, it's super messy. If you think this is messy, that's super messy. Because that carbon black carbon gets on everything and it's greasy and it's just a disgusting mess.
Gary The Water Guy:
Okay. So I never said that replacing the media was going to be fun or easy and you probably see why now. Anyway, so I've flushed out the tank, I've washed it all out. And I've also washed the riser tube. It's nice and clean. So I don't need to replace it. But again, if you have an iron filter or something like that, you're probably going to need to replace the riser tube. And so then what you need to do is you need to use, I like to use plumbers, not plumbers silicone. I like to use painter's tape. That's what I like to use on the end of this, because we need to make sure that no media ends up inside the riser tube. So you can put a piece of tape on the end like so, and then another piece around the outside. And so if you need to cut a new riser tube, you have to be careful if you've got the old rise tube, great.
Gary The Water Guy:
You can use that as a guide, in terms of the length. Depending on the valve that you have, I believe with [outer troll 00:14:51] valve, it has to extend beyond the edge here. I think it extends about half of an inch or three quarters of an inch. With the Clack belt that we're using here, it's flush. Different valves are different specs. So make sure you check that out. But like I say, if you've got the old one, you can use that as a guide. So at the bottom of the tank, there's actually a dimple in there. So you need to make sure you get the riser tube in that dimple, especially if you're cutting it from scratch to make sure you get the right length. All right. So once you've done that, then you can use some. Now we get the plumbers clear silicone grease and we'll squeeze some out. And we put that around the outside here. And so you can either put it on here or you can put it on the old ring. It doesn't matter what you do. And I'll just grab a cloth here.
Gary The Water Guy:
All right. So then you're going to need a funnel. This one's actually made for this purpose, but it's no rocket science here. You can take any kind of automotive or gasoline funnel or something like that. Cut it the right side so it fits. And so if you're putting gravel in, because that's what your unit calls for, then you need to put enough gravel in to cover the top of this basket at the bottom. That's so much. And they usually have a spec for that. It's usually something like five pounds or something like that. All right. So as I mentioned earlier, I don't need a full bag of resin for this size water softener. It's a 27 K softener. So what that means is I had to take 10% out of this bag.
Gary The Water Guy:
It's weighs 50 pounds. So I took five pounds out. So now it's a matter of putting the media back in. And so you want to end up with the riser tube in the middle and that's kind of why I'm moving it around a little bit too, to keep it in the middle. As it gets more and more full of media, it will just stay in the middle automatically. And so unfortunately they just doesn't fall in. You have to kind of move it around a little bit to get it to fall in to the tank and obviously try not to spill it. And then we're just pouring the remainder in there.
Gary The Water Guy:
There we go. Shove it in there. Just going to put the funnel in here so it doesn't make too big of a mess. And then once you've got it in there, clean this up a little bit like so. And you can pull that tape off. So when you're pulling the tape off, make sure that you don't pull the riser tube up. That's the last thing you want to do is a polarizer tube up. And then you're going to put some silicone grease on the end here, mix that and then put the head back on. Feed it around. So then when you get it all the way on, I usually grab it with my feet and then give it a last little tighten, like so, and then we're good. We can put the jacket back on and get it back, hooked up to the plumbing.
Gary The Water Guy:
Okay. So I've connected it up back to the bypass and put the jacket back on. I've got the e-clips here, ready to go. So I'm just going to remove this drain line here from the iron filter. A little bit of water came out of there just so that you can see a little bit better, because this is the water softener over here. So now what we need to do is we need to put the brine line back on. So one thing you need to do is be sure you don't mix these up. The drain line always goes out the front. They're the same size fittings. So just be careful of that. And so we've connected the brine line here, and then we're going to connect the drain line here for the water softener. And because of these two drain lines are hooked together, whatever you do, don't try to... I'm just going to clean this off here. It's a little bit dirty here. Whatever you do, don't try to put it into backwash without reconnecting the drain line to the iron filter, because it would just come squirting out of that line.
Gary The Water Guy:
All right. So we just make sure all of our e-clips are nice and tight. Okay. And they are, so now you can put the water softener back into service. So the first thing we need to do is we need to backwash it, to get all the air out of it. So we just put it into re-gen. So I've got it plugged in. Now you can hear the re-gen is starting up. So it's still in bypass right now. I also put the iron filter in bypass too, just to be on the safe side earlier on. So now it's in backwash. So now we're going to open up, not all the way. We're not going to open up the bypass all the way. We're only going to open it up halfway. So what's happening now is the air is going, the water's going down through the riser tube out through the screen and it's expanded the media inside the tank and what it's doing, it's putting water in there, but it's displaced in the air. So you see the air is coming out of the drain line here.
Gary The Water Guy:
So it's an eight minute backwash. So for about half of that backwash time, about four minutes, we're just going to have it open halfway. And once the four minutes have gone and we see that there's water flowing smoothly through, without any air, you could see some gushes of water going through there now, like I say, wait until go four minutes. And then after that, you can open up the bypass all the way.
Gary The Water Guy:
Okay. So we're pretty much four minutes into it now. So what we can do is we can open up the inlet all the way and we can open up the outlet all the way. There's nothing flowing out right now. Mostly going to open up the iron filters just to make sure I don't forget for later on. And then we're just going to let this finish going through its whole regeneration cycle. And then once it's done that, with this kind of water softener, usually takes about an hour and a half. Once it's done that, let some water run to the drain. I would suggest you I'll just turn this off for a second. So it's not so loud. Let the water run through the drain somewhere. I always suggest somewhere like a bathtub or laundry sink somewhere that doesn't have a little screen, just so that any little, a minor small pieces of media that get flushed out before you run it throughout your whole house. And then, like I say, we're just going to let this finish up.
Gary The Water Guy:
Go here for your next video on Waterfield tracing for your home cottage or cabin. And I'll see you there.